The majority of Laptops come with a small chassis which makes it harder to cool them when you’re using power-hungry apps such as development, content creation, or deployment. Sometimes the issue relies on your physical maintenance of the laptop; see whether the air ducts or outlets are properly cleaned and check if you are giving frequent resting time for your laptop to cool. Sometimes installing the default BIOS driver for your laptop is the right way to fix laptop heating issues in Windows 11. Today in this article, I will share with you all the working tricks and troubleshooting methods I use to fix any laptop heating issues after Windows 11 installation.
Laptop PC Heating After Windows 11 Update
Before proceeding with this article, I recommend you crosscheck your laptop specifications to see whether it supports Windows 11. Because if you install a heavy operating system much like Windows 11 on a lower spec computer, it is obvious that it’s gonna lag or create heating issues. According to the official announcements, Laptops with 1 gigahertz (GHz) or a faster processor with 2 or more cores on a compatible 64-bit processor will work just fine. It is noticeable that laptops with 32-Bit processors do not support Windows 11 yet.
Method 1: Check Laptop Ventilation System
It often occurs that we start using a laptop in a bad posture such as on mattress, sofa, kitchen, etc. Laptops are designed to work on desks or tables, or at least a flat surface. Most laptops have ventilation ducks below their chassis. So if you use a laptop by putting it on your mattress, it will suffocate and will heat up. To make sure your laptop doesn’t overheat, try to use it on a flat surface; even if you have to use your laptop on the bed, use a laptop tray or cooling pad. If your work requires you to use your laptop for an extended period of time, buying a cooling pad can definitely help you with this problem.
Method 2: Check whether Laptop Fans are Working
It is also possible that the laptop fans which are responsible for cooling down your laptop, are not functioning properly. Either they have a lot of dust in the cooling chamber, or the driver for your motherboard is not working accurately.
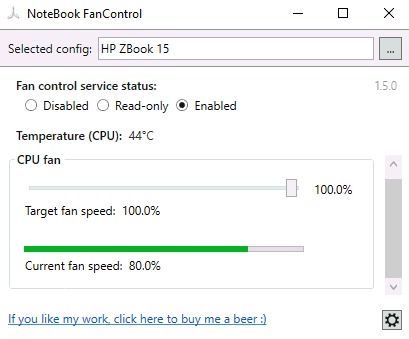
It is easy to check your laptop fans’ health via third-party software. If you find that your fan is not working, you can open your laptop chassis lid and inspect the fan assembly. Remove any obstacles and debris from the fan cooling system.
Method 3: Optimize Background Apps Performance
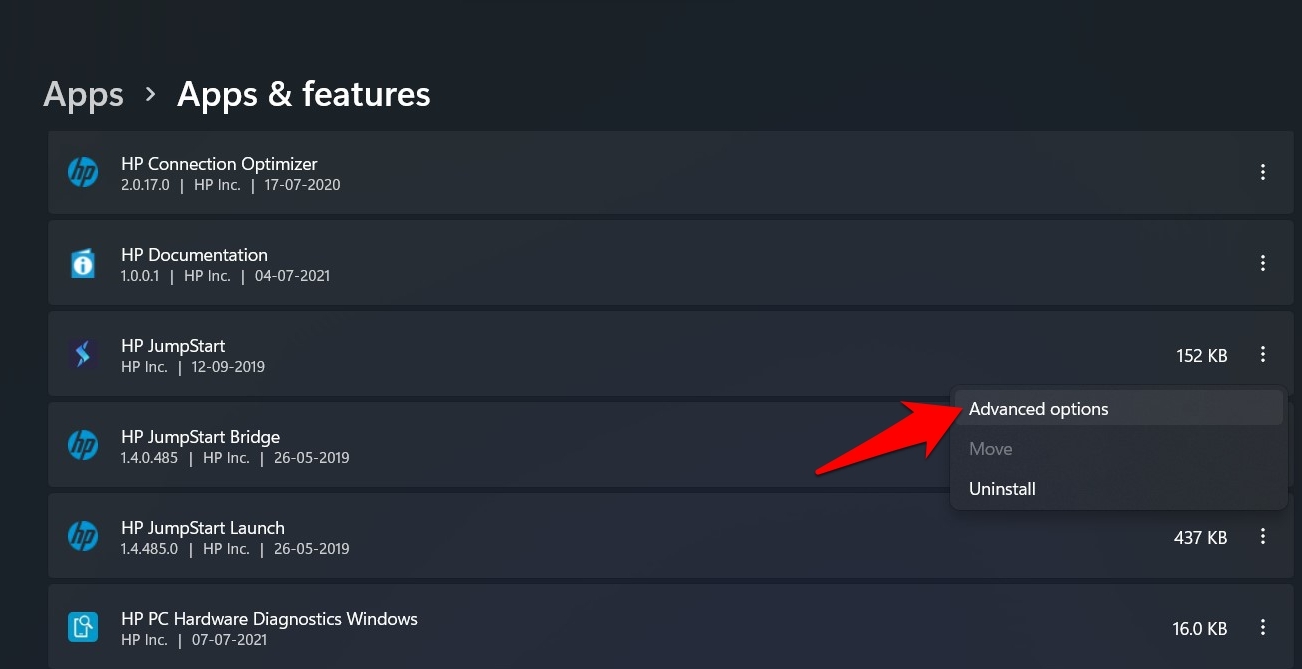
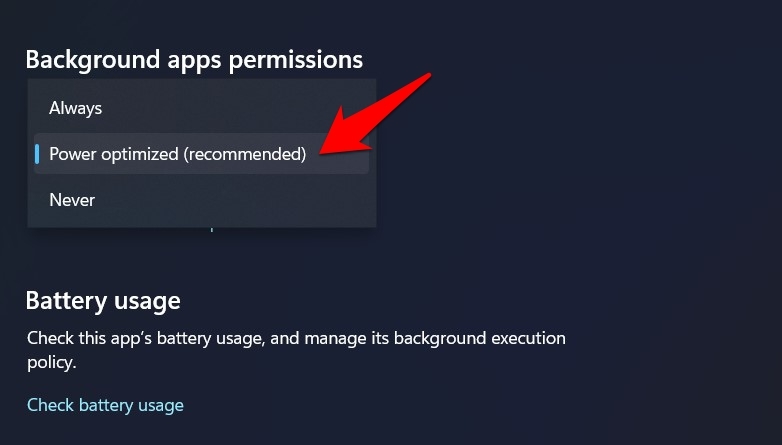
Background apps are known to be among the most common culprits when it comes to quick battery drainage issues. Therefore, it’s recommended to set their behavior to Power optimized so that they maintain a balance between performance and battery consumption.
Method 4: Disable Background Apps
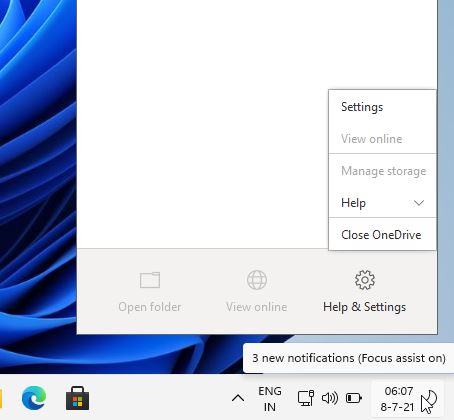
Background apps can run without your info and can put unnecessary load on our laptop CPU. Due to this, your laptop will heat up even when you’re not using it with your power apps. Most apps you run need to be closed thoroughly via taskbar; otherwise, they will keep running in the background. Steps to disable background apps in Windows 11:
Go to Windows 11 taskbar and see what apps are running in the background.
Go to extended options and close the app.
Some apps might have different options to close the app, so see the “app close” option in the app preferences.
Method 5: Update graphics card driver
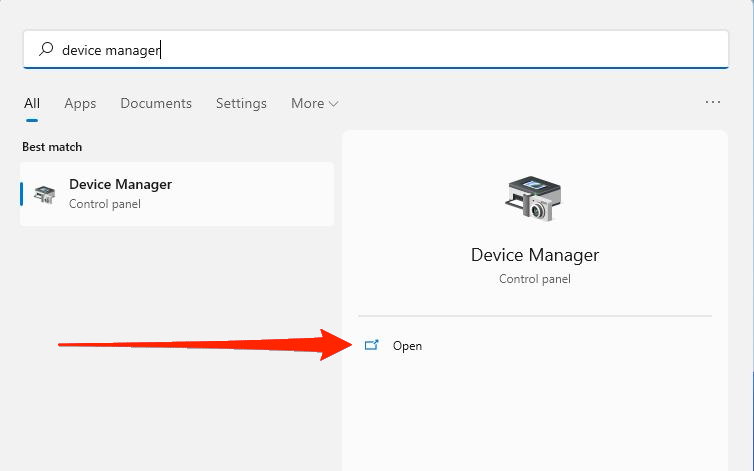
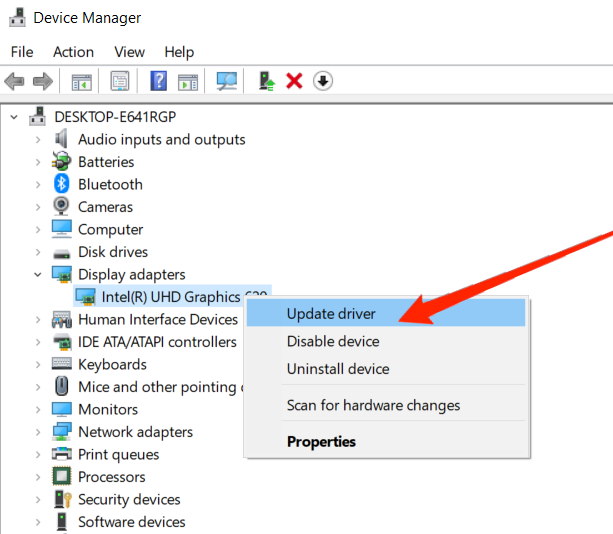
A Graphics card is an important component of your laptop that helps with graphic processing. So if you watch a movie, play games, or deal with content creation work, a Graphics card plays an important role. Windows 11 has inbuilt generalized drivers which work with most of the graphic cards which come in your laptop. However, the wrong drivers can make your laptop hotter and may cause performance issues. Steps to update graphics card driver on Windows 11:
Open device manager on your laptop.
Find your drivers and update them as follows.
If you are not able to update drivers, you can download the driver’s package from your graphic cards manufacturer’s website.
Method 6: Disable Startup Apps
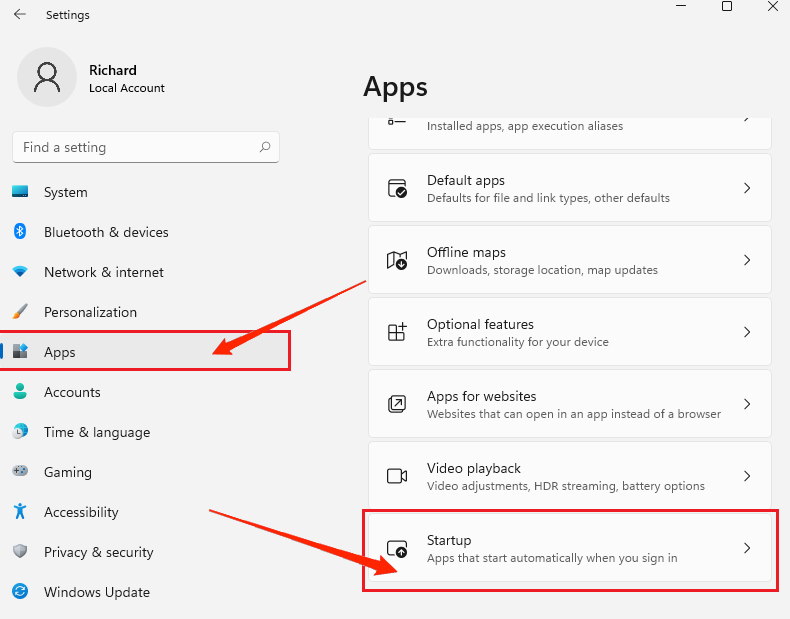
Startup apps can make your PC or laptop considerably slower and heat up while you’re using your device. These apps run at startup and take CPU resources, making your device hot. You should keep only important apps in the list of startup apps to avoid overheating problems on your laptop. W already have made a comprehensive guide on disabling startup apps in Windows 11. Steps to disable startup apps in Windows 11:
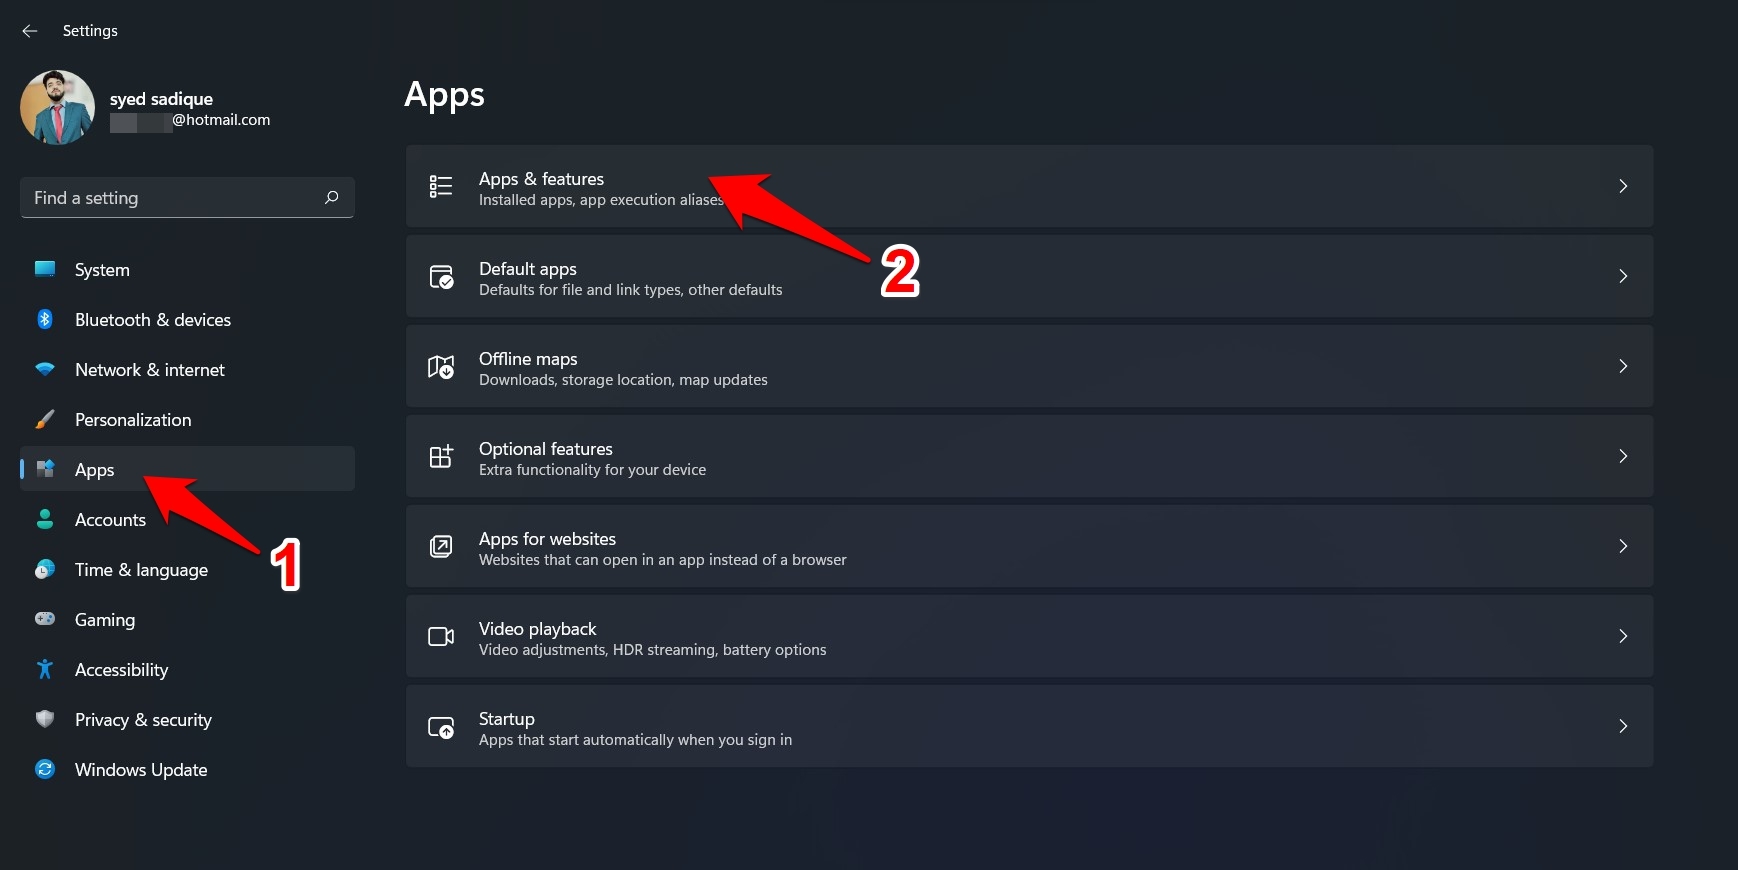
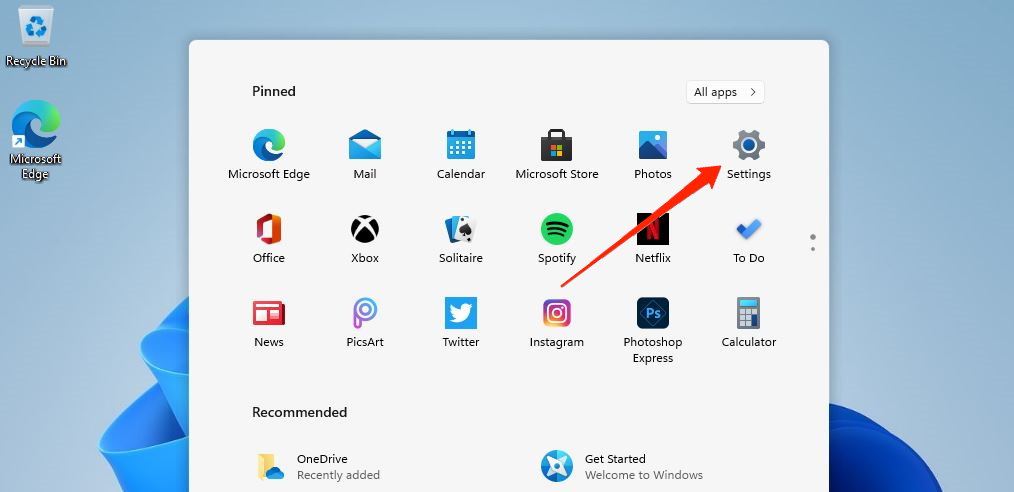
Open the Windows Settings app and navigate to the app option.
Now go to the Startup option.
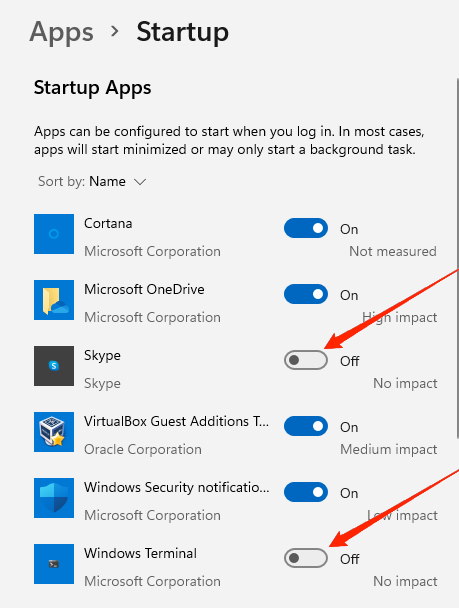
Here you can see a list of apps that runs at the startup of your computer.
In order to disable any app, move the slider to the left. Disable all the apps which you don’t necessarily use on your laptop.
Method 7: Run System Maintenance Troubleshooter
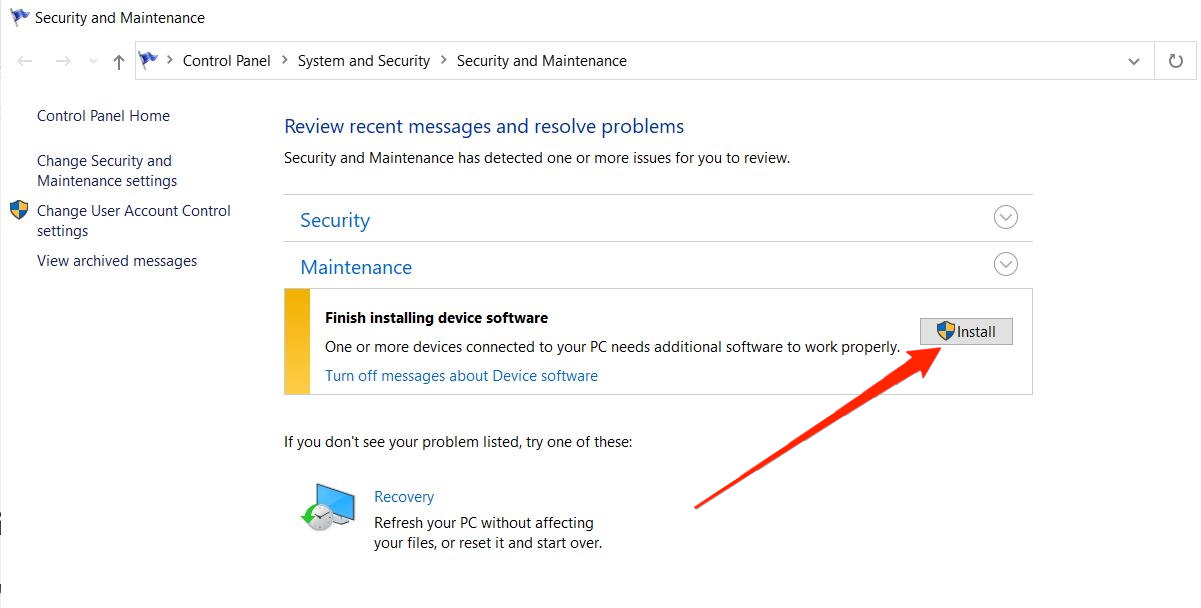
Windows 11 comes with an inbuilt troubleshooter, which can help you to fix minor issues with your laptop or PC. The system maintenance troubleshooter can guide for about missing drivers, faulty drivers, system crashes issues, and missing files. Overall it is a nice tool to troubleshoot any problems. Steps to run system maintenance troubleshooter:
Open control panel and navigate to System and Security > Security and Maintenance.
Here follow the onscreen instructions under the maintenance tab.
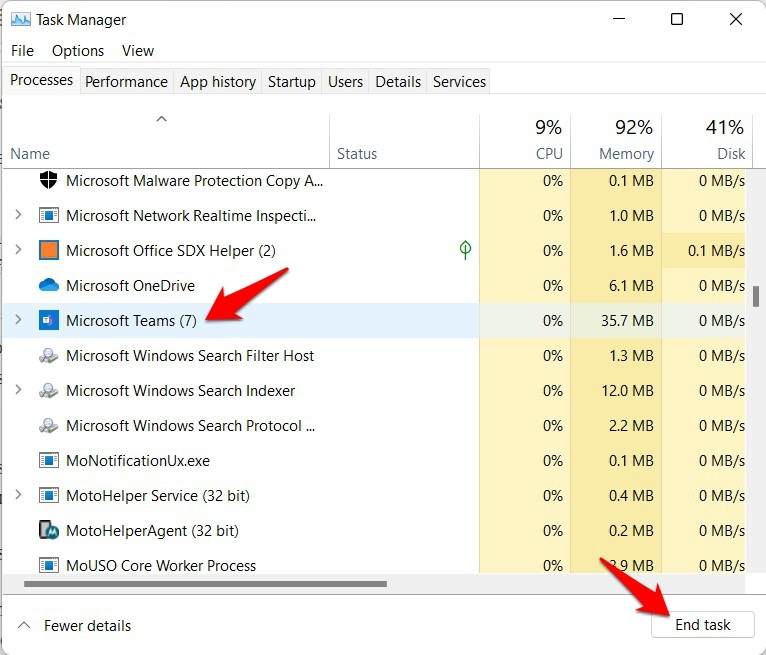
Method 8. Kill Resource Hogging Apps/Services
First and foremost, have a look at all the background running apps and services and then stop the ones that are consuming an enormous amount of CPU and Memory. This is because the apps hogging unnecessary system resources also consume much of the battery juice. So it’s better to suspend them, which could be done as follows:
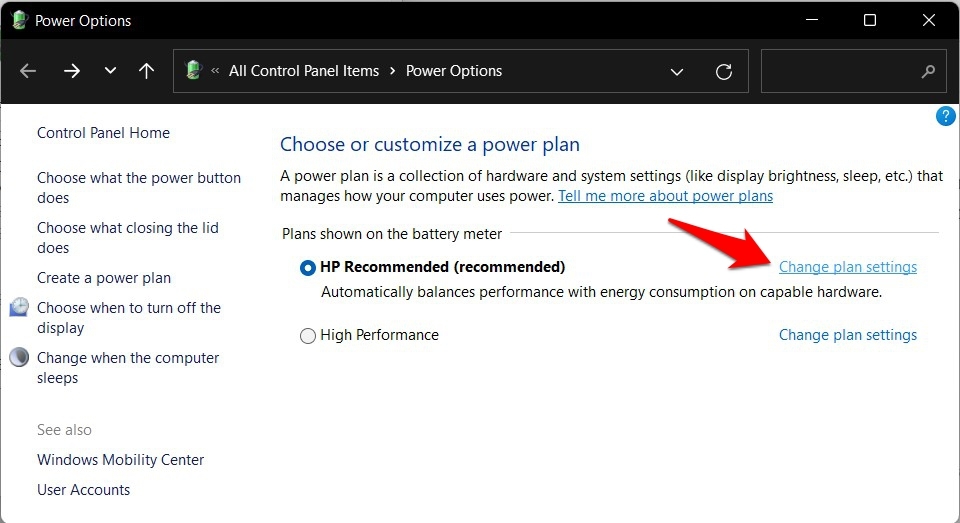
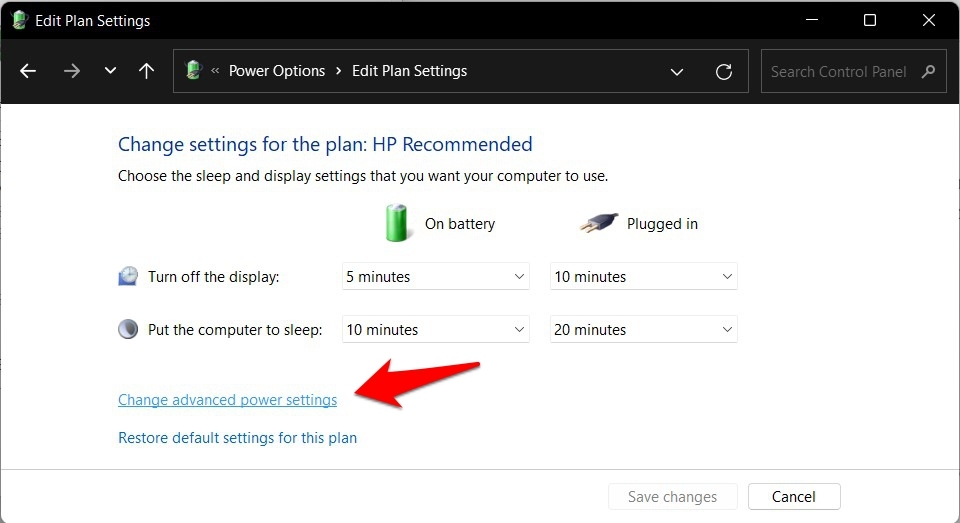
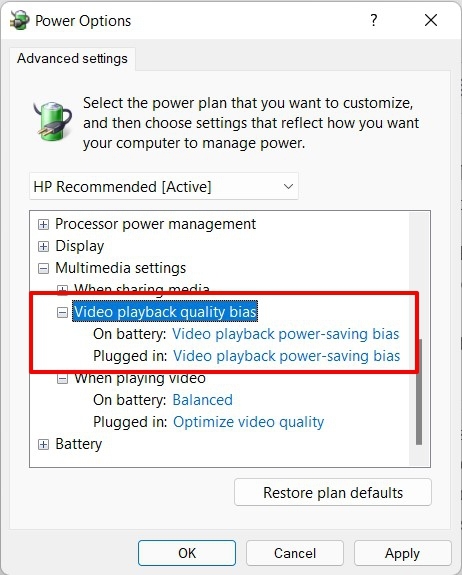
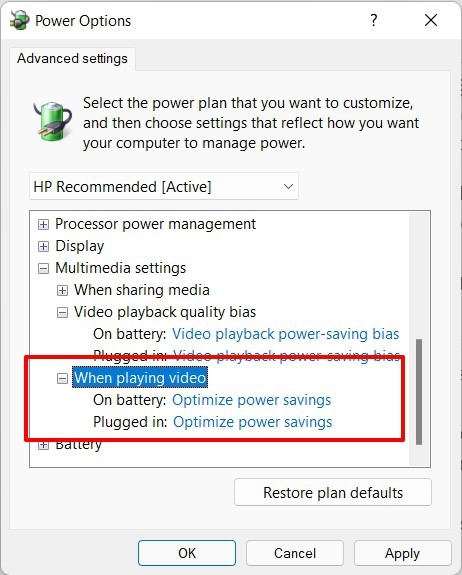
Method 9. Configure Power Plan
Another approach that you could help ease the heating issue is to tweak your PC’s power plans. This involves modifying its settings so that it gives more weightage to the power-saving mode, especially when dealing with multimedia files.
Conclusion
As you see, figuring out the heating issues with your laptop can be tricky but not impossible. In most cases, you will be able to fix the heating issues by installing the correct drivers for your laptop. If the issues are still not solved, I recommend you buy a laptop cooling pad, which will help keep the temperature down. If you are a power user, then you have to give your laptop some rest and let it cool for some time after heavy usage. This will prevent any heat damage and will increase the lifespan of your laptop. If you’ve any thoughts on Laptop Heating Issues After Windows 11 install | How To Fix, then feel free to drop in below comment box. Also, please subscribe to our DigitBin YouTube channel for videos tutorials. Cheers!
